
Storing a bike when you don't have a garage is always a pain (unless the bike is a piece of shit, then you don't really care). However, my bike is not a piece of shit, and I'd like it to stay that way. In previous years I stored my bike at my parents' house, a couple of towns over. Due to a whole lotta reasons I won't go into right now, the bike was stored there for the better part of two years. Although it was in a garage, since I wasn't able to wash it or polish the copious amounts of chrome semi-regularly, there was some pretty bad oxidation in some places, to the point where a few pieces needed replaced (the old pieces will probably become an experiment with home powdercoating - stay tuned). I decided that I would need to find a storage solution that would allow me to store the bike securely, but still have it on the premises so I could give it some attention every so often (not to mention the occasional ride, should the temperatures rise to an acceptable level).
After some poking around on teh intarnets, I found the CycleShell enclosure. I thought it looked like a great idea (still do) but there were a few cons:
1.) It's pretty expensive ($375 for the size I needed):
2.) Shipping is pricey ($80 to a private residence - cheaper to a business address):
3.) There is a 2-week wait, as each one is custom-built.
I went to some of my favorite motorcycle forums and explained what I was looking for, and asked if anyone had any recommendations. I was told about two other covers I hadn't heard of before: The Bike Barn and the Cycle Shelter. The Bike Barn was ruled out almost immediately, as it doesn't have a "floor" - they claim that it is unnecessary, but I live right by a busy road with a perpetual construction site across the street, and EVERYTHING on my patio gets coated with dust in short, even if it's covered. I found the Bike Barn more interesting- it didn't look quite as sturdily constructed as the CycleShell, but it was available immediately for a lower price and was cheaper to ship. As money was a little tight that month, I decided to go with the Cycle Shelter.
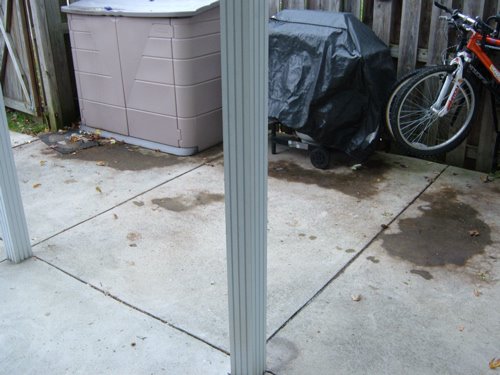
Note: Originally I had a fairly pricey Dowco cover for my bike, but after a few seasons (and some run-ins with some territorial stray cats - ick) I decided to try washing it, and it dissolved in my washing machine. Since the summer I had been using a cheap & way-too-big cover I picked up at Sprawl Mart for fifteen bucks:
 The bike in hiding.
It turned out to be a good time to change covers, as the lining in the windshield area of the above cover had just decided to fall apart, and it was getting nasty stuff all over my bike. So, the cover came off:
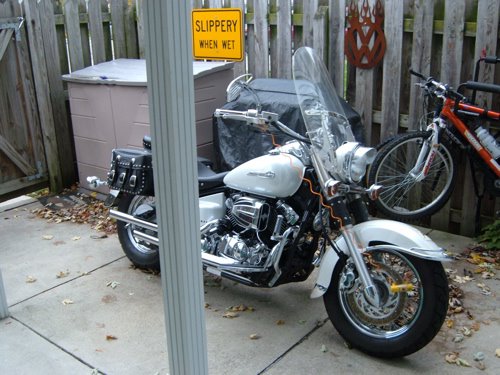 The V Star unleashed!
The first step was clearing the patio of most of the leaves that had accumulated lately, lest they rot underneath the enclosure:
The next step was laying out the fabric enclosure of the Cycle Shelter:
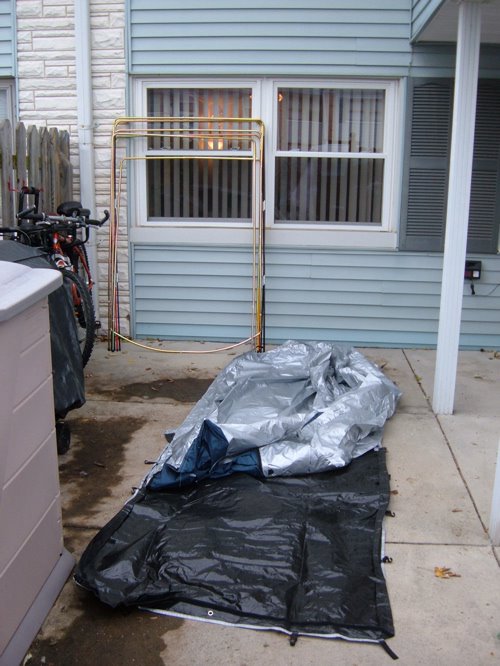
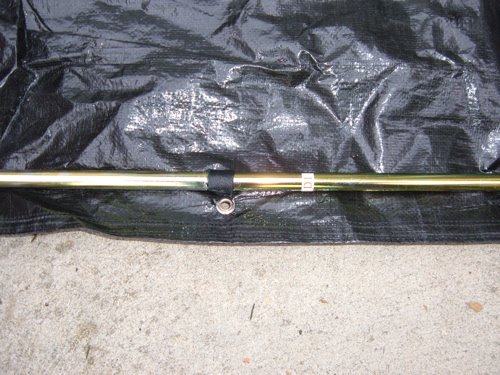
Those are the poles that act as internal support leaning against the side of the house. These are pretty much exactly like modern tent poles - a combination of aluminum and shock-corded fiberglass sections that snap together. They are labeled with a code that corresponds to the rest of the poles in each support. Although one set of poles in my shipment was missing its stickers, it wasn't hard to figure out which support they belonged to...The construction is very similar to a tent as well - it appears to be made of ripstop nylon with reinforced seams, a weather-resistant coating and a heavy-duty plastic "floor". I assembled the poles inside, as it was a pretty blustery 40 degrees outside. The poles slide into the fabric of the enclosure and are secured by a "pocket" at the pivot point and a hook-and-loop enclosure every couple of feet:
Now, it took me all of ten seconds to write that last sentence, but this was a serious pain in the ass. The poles fit TIGHT, and the hook-and-loop enclosures are industrial strength, but tiny enough that they are a pain to work with and kill your fingers. If you have obedient children or a petite mail-order asian bride, this would be the time to enlist their help. Overall, I would say assembly took me around two-and-a-half hours, start to finish.
Once you get the hang of assembly, it gets easier as you go. You are working with a big heap of fabric at first, but as you progress it starts to take shape and it is less of a chore to secure the poles.

After getting the first half of the poles secured, I would recommend partially opening the Cycle Shelter to get the supports "seated" along the reinforced seams (I didn't do this 'till later, and it took considerable wrestling). After assembly, it should look something like this:

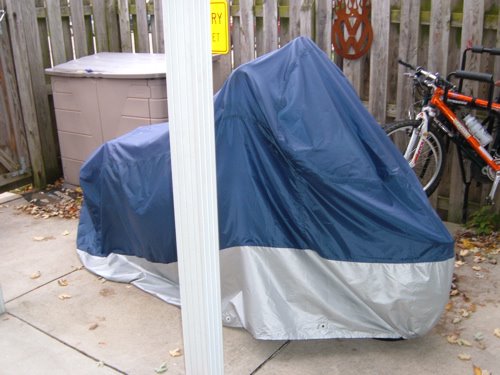
Then, you simply ride the bike onto the enclosure...

...and close it like a big clamshell.

Sorry about the picture, but this thing is BIG, and I'm working in a pretty small space here. It's actually much bigger than I expected - I think you can see the peak of it over the top of my privacy fence. My condo association is pretty lenient, so I don't expect there to be any hassles, but if you lived in a hoity-toity development you might get some flack over this thing.
After you close it up, a series of clips sewn into the underside snaps onto the last support:
 (Excuse my fat fingers).
There are velcro flaps along the top & bottom edges of the enclosure that appear as if they wouldn't close very well, but when you snap the clips into place it actually lines up pretty easily. The are vents at the peak of the enclosure on each side as well as a large one at the front. The Bike Barn people also included an "anchor kit" that consisted of basic tent stakes, nylon cord and some funky sliding grommets that I couldn't figure out what I was supposed to do with (no directions for this part beyond "Use the anchor kit to secure the enclosure". Gee, thanks). As I have this on my concrete patio, I'm not going to worry about it anyway - I will take the manufacturer's suggestion and pick up some tube-shaped sandbags to place along the outer edges to keep it secure. I also purchased their locking option for an extra ten bucks, which consisted of an extra-long Masterlock padlock that I can't figure out where to attach. Regardless, after assembly it seems pretty silly, as a thief could easily slash the fabric to get the cover off. Oh well, it's a nice padlock for the price, I'll find something to do with it. I noticed on the Cycle Shelter web page that they no longer offer the padlock, but now they have an electronic alarm for $50 with purchase, as well as some titanic locking wheel-chock thing that costs $225 and wouldn't work for me anyway, since I have spoked wheels (besides, I already have a Kryptonite disc lock that has served me well for years). They also offer a heater kit that looks interesting. Maybe I'll email them and see if they'll give me a break on the price of a heater and an electronic alarm, since they weren't offered when I ordered mine.
So, I guess the question is, is it worth it? Only time will tell - if it last for ten years, then yes. I hope it last for a good long while, and for the price it should. It will be nice to not have to mess with a traditional cover after riding, and not having to wait for the pipes to cool down before putting the bike away (since the sides of the enclosure don't touch the bike). So here's the skinny:
Pros:
-Quick & easy to put bike away, no waiting
-More secure than traditional covers
-Won't blow off when it's windy
-(seems) Sturdy
Cons:
-Expensive
-Assembly is a pain, minimal instructions
-Much bigger than I expected
Overall, I saved $135 by going with the Cycle Shelter over the CycleShell. Knowing now about the assembly process and construction, it's kind of a wash - if you're a cheapskate like me and an afternoon of crawling around on your patio is worth saving the money, go with the Cycle Shelter. If you want it quick & easy or have an employer that's cool with you getting packages at work so you can save a few bucks on shipping, go with the CycleShell.
UPDATE 03/21/06: As jimmy mentioned in the comments, I originally got my product names switched around, so I fixed that. According to my referral logs, some people are finding this page when looking for product info on enclosures, so it also gives me a chance to do a follow up of my experience with the Cycle Shelter. I have had problems with the design of the velcro around the bottom of the enclosure - it potentially could form a tight seal, but only if you take a loooong time crawling around on the ground to make sure it is all lined up exactly right - I opened the enclosure to hook up a battery tender after a few weeks with a lot of rain, and there was a puddle of standing water in the bottom. It is made even harder by the fact that with sandbags weighing down the bottom, the enclosure is very taut, making the velcro especially hard to secure at the corners - I actually jammed a towel in the space at one corner after getting frustrated with messing with the velcro for ten minutes. I have also had problems with water collecting on top of the enclosure - The sides of the "arch" formed by the support poles isn't steep enough in the back to allow water to run off fast enough. I solved that problem by undoing the hooks on one side of the second support - this creates a slope that allows the water to run off. It solved the problem, but it's not something I should have to deal with. Taking those issues into consideration, I would probably recommend the CycleShell over the Cycle Shelter - it is obvious from looking at the photos on their website that these would not be issues with their design.


8 comments:
Huh, you're right - don't know how I screwed that up. I'll edit it later...
Thanks for doing what Cycle Shelter should have done in the first place - provide a decent set of instructions to put the darn thing up. I now am unpacking a Cycle Shelter (for my shiny new Triumph America)- I live in Boston and can expect bad weather - and am appalled at the lack of good set-up instructions.
Regards,
Paul Wesel
Boston, Mass.
Thanks for your comments, Paul - two years after my write-up, "Cycle Shelter" is still a pretty common search term for visitors to my blog, so apparently you aren't the only one who who is puzzled by the lack of instructions. The Cycle Shelter will probably only last one more winter, I'll do another review when I get a replacement...
THANK YOU for posting some real comments. It looks like for the price the Shell comes with stand pad and a nice deck + other valuable things. I was wondering about the deck on the Shelter and you confirmed my hypothesis.. it is like a tent. I closed in my garage for my retired parents and my carport nitch is a vacuum for dirt and leaves. Shell it is!
i bought a cycle shelter less than 1 yr ago...with my older bike...a suzuki c50t...no problems...my now bike... a bmw k1200lt... much larger bike... on the side stand it is a very snug fit... and the metal tube at the entrance way broke...along with the flooring tearing all the way across as well... i waisted my money...i am waiting to get the shelter logic motorcycle shelter... no flooring...but with the proper vents... should not be a problem... i'll know in a year or so... also much cheaper... and a bit larger... there are several sizes...
http://www.northerntool.com/webapp/wcs/stores/servlet/product_6970_200312915_200312915
We had ordered 2 cycle shelters and needless to say they are totally shot. We live in Nevada so all we usually get is the wind. One of the shelters already has the floor torn and the poles keep popping out of the sides of the tent. The straps had 3 stiches holding the it to the bottom of the shelter and they tore the first week. I would NOT ever recomminding this product to anyone.It turned out to be a very expensive lesson.
I too have a Cycle Shelter, when I should have purchased a CycleShell. The Cycleshell is a little more expensive; but it has a hard floor and the entire rig is pre-assembled; so it's simply a matter of getting it unpacked, laying it out and putting your bike in it. I'll use th Cycle Shelter until it proves useless or unserviceable, but will likely order a CycleShell within a season or so.
Hi
You have good looking one. I also have a hight quality motorcycle cover for my bike.
Post a Comment