One great thing about the Internet is that is bridges the void that exists between members of a sub-culture - for example, living in the Midwest, it is hard enough to find a vintage Volkswagen that still runs, and "clean, rust-free" examples don't exist here. That is not the case in the West and parts of the South, where many VW's can still be found on the road as daily drivers. One thing you can say about VW owners, they have embraced the Internet with unparalleled enthusiasm, as shown by such web sites as The Samba and the Type II mailing list.
One of the common problems with vintage VW's is that they are like driving a noisy icebox, due to the lack soundproofing & insulation. Many people have addressed these problems in their own way (it is a source of perpetual discussion on the mailing lists) but the definitive guide was written several years ago by a man named Matthew Bulley, who authored a very detailed website regarding his solutions to the problem. Unfortunately, several years ago Mr. Bulley's site disappeared from the Internet, but Jason at shagadelic.org was kind enough to rescue a copy from The Wayback Machine and host it on his servers. (You really should read it first, or this post won't make nearly as much sense. Besides, it's much more entertaining that you would expect). What follows is my attempts to complete an abbreviated version of Mr. Bulley's instructions. Why abbreviated? Well, two reasons: 1.) The original directions are very detailed and labor-intensive, and 2.) I am lazy. Also, I plan to renovate the interior of the Bus pretty extensively in the future, so it would be pointless for me to get too involved. Yeah, that's it... always thinking ahead.
The first step was obtaining the materials: First a product sold through JC Whitney (yeah, I know) as "NASA insulation":
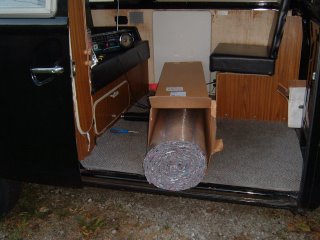
Big hoarkin' roll of insulation.
(Note: Does anyone else find the idea that NASA uses products available at JC Whitney somewhat disquieting?) This stuff is made of ground-up chunks of foam (I'm guessing it's a way to put leftovers and odds-n-ends to use) bonded to a foil backing, with a grid of fiberglass mesh sandwiched between them to prevent it from falling apart. I don't know how much it helps structural integrity, but it sure makes it a bitch to cut. Here's a shot showing the back of the insulation:

The second major component is some type of soundproofing material:
Soundproofing, compliments of eBay.
This material is made of an asphalt emulsion bonded to a heavy-duty foil backing. The other side has a peel-off liner covering a self-adhesive coating:
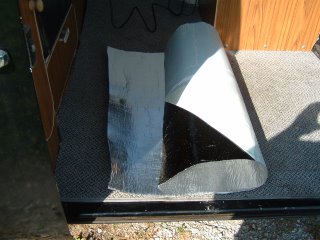
I used to use this stuff a lot in high school, when high-end car stereos were my primary hobby. Back then it was only available under the brand name Dynamat, and it cost a fortune. Now there are many other brands, such as Roadkill, Brown Bread, and assorted generic varieties that all work well. Just search for "car soundproofing" on eBay and you'll get plenty of hits - just watch the shipping costs, they're a killer.
The basic idea is simple - peel the backing from the soundproofing, heat it up with a heat gun, and stick it to any exposed metal. I used a cheap heat gun I purchased from Harbor Freight (Harbor Freight & JC Whitney in ONE project?!?! Boy, I am doing my reputation wonders...) After that, use some 3M spray adhesive to attach a section of the NASA insulation over top of that. In theory, things are a little more time-consuming, all of that material needs to be cut to fit, and both the soundproofing and the insulation will destroy a high quality utility knife in short order. All in all, I spent the better part of three days crawling around inside the bus, and my hands were raw and bleeding when I finished. I tried to wear gloves, but they slowed me down too much, so I sucked it up.
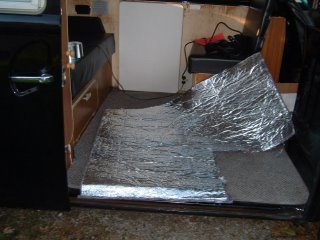
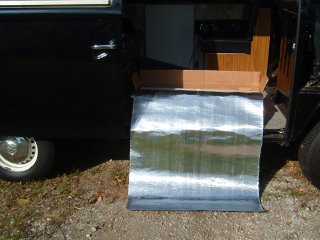
Cutting the insulation for the passenger compartment.
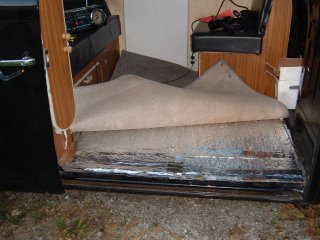
 The rear compartment before...
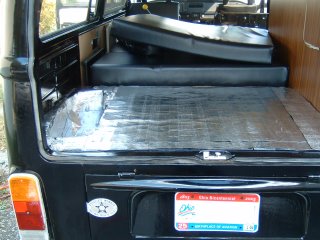
...and after. This area got two layers of soundproofing, since it is directly over the engine.


...and insulation...
...as does the storage area under the rear seat.
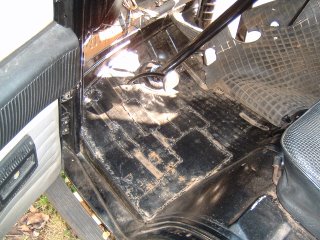
The drivers' compartment floors "before". Note the blobby Frankenstein welding job by a previous owner to repair the floors.
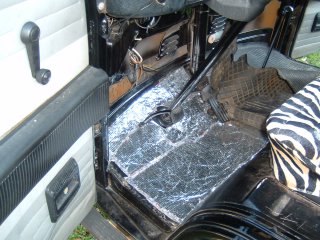
...and after.
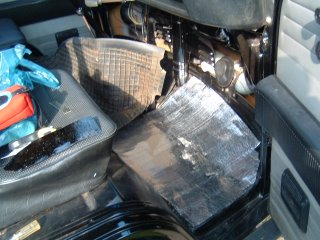
Passenger side also gets soundproofing...
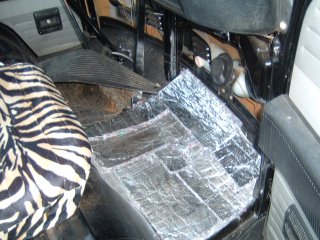
...and insulation.
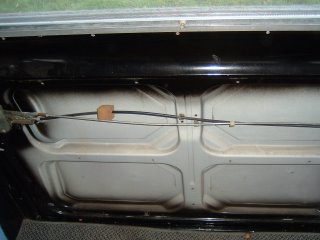
Interior of the sliding door before...
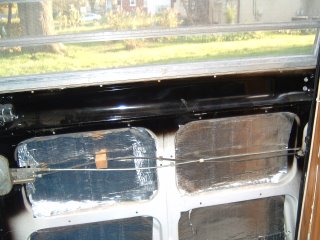
...and after. Several small patches were used here instead of one large one. Insulation was bonded to the wood paneling instead of the door itself.
...and that's about all the pictures I have. One detail I left out was that I used foil tape to seal the edges of the insulation to the soundproofing. I am pretty much to the end of the insulation, but have a bit of soundproofing left. It is definitely quieter than before, but I still have to do the entire interior wall on the drivers' side. That will require removing most of the interior, so I am waiting until I get to the bulk of the interior renovations for that. I would also like to insulate the roof, but I am playing with the idea of replacing it with diamond-plate steel... don't tell the VW guys, as the original whitewashed birch wood paneling is highly prized among purists.
If you read Bulley's article, there was a lot of detail about refurbishing the factory heating system so it does a better job. This is not an issue for me, since I don't have a factory heating system. Nada. None. Seems it was entirely removed by a previous owner (this is actually pretty common, as the VW heating systems were inefficient when poorly maintained, as most were). I have a portable propane heater in there now, but will try to piece together a new system when the new engine goes in.





No comments:
Post a Comment