
Now, this isn't you standard how-to file, as there are plenty of places on teh Internets where you can get that kind of thing. I'm gonna tell you how I build things. To start with there are three basic rules:
1.) Scrounge whatever you can - the less you buy, the better. Many of you are lucky enough to work somewhere that usually has lots of scraps and other useful stuff in the dumpster. If you don't, drive around on trash day and look for stuff. If you still can't find any, drive around until you see a bunch of kids on BMX bikes or skateboards playing on a homemade ramp, and ask them where they got the wood to build it. Chances are they "found it" somewhere - that "somewhere" is more commonly called a "construction site". DO NOT steal stuff from the construction site - but there's probably a dumpster there, check it for scraps.
2.) In a perfect world, we would all have huge workshops, beautiful workbenches, and instant access to any tool we could possibly need. However, in MY world, a "proper workspace" is "any workspace with enough room and a power outlet". For example, you will probably notice from the pictures that follow that this construction project took place entirely in my kitchen, as I don't have a basement or garage, and it was 5 degrees outside. You will also note that I am single. If married readers decide to get sawdust all over the wife's kitchen, do so at your own peril.
3.) You may have heard the old adage, "Measure twice, cut once". This is untrue. Measuring is for dance majors and Frenchmen. Same goes for safety glasses.
Okay, the first step is to gather the wood that has been scrounged for this project. For my purposes, this consists of a chunk of plywood about 40" x 16" (anything over about two-and-a-half-feet will work), a plank that is at least as long as the plywood is wide, and a chunk of 2"x4" (length is not as important with the 2"x4", but you want it as least as half as long as the piece of plywood).

(On the far right is a roll of carpet, we'll get to that later). I cut any funky ends off the plywood so it's more or less square. Next, I held the plank up to the plywood and marked the length (technically, this is not measuring) so it's the same as the width of the plywood: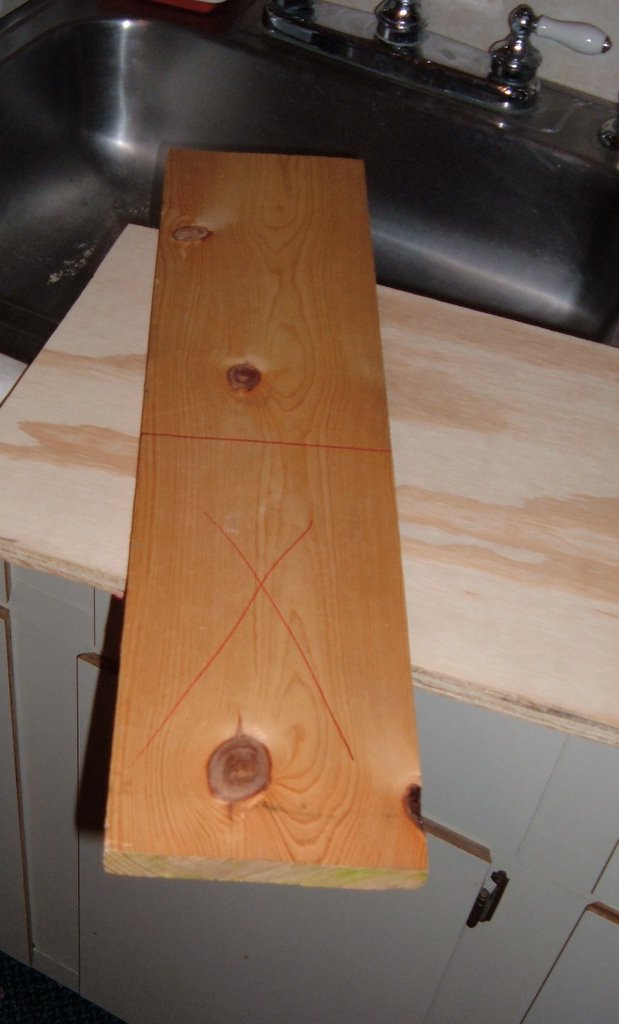
I grabbed the nearest sharp implement and cut the wood. Next, I took a straight edge and drew a line (again, not measuring) from opposite corners, dividing the plank diagonally:
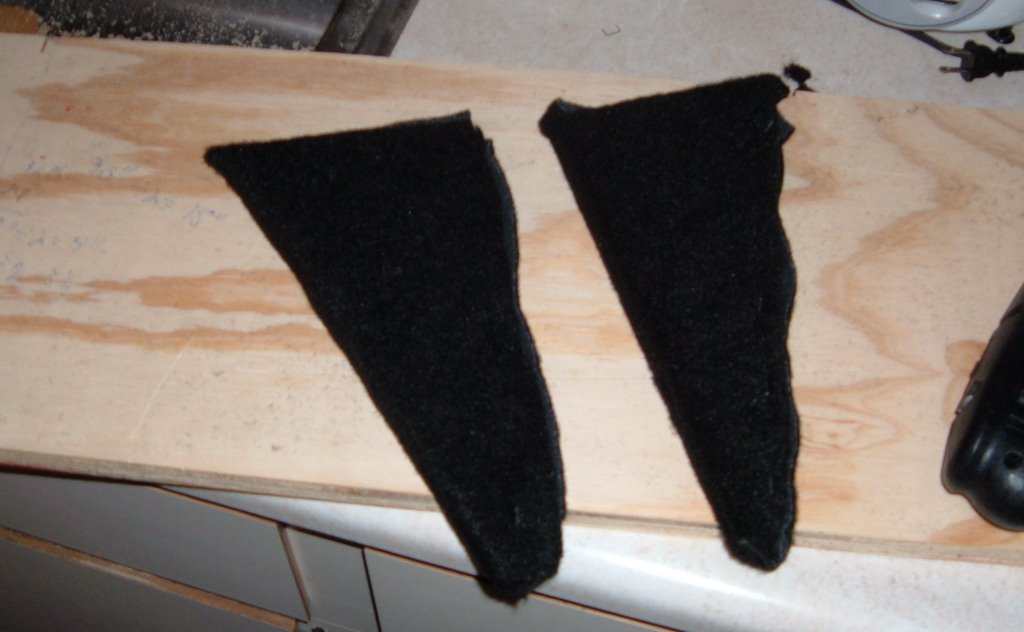
...and cut it:
(That's the kind of sweet line you can only get working freehand, with a $15 jigsaw equipped with a dull sheet-metal blade). Now, I put the the two "ramps" on the plywood, and put the 2"x4" between 'em. This is just a mock up for now, but, you can see that the ramps will provide the incline to the pedalboard, and the 2"x4" will provide horizontal support. After everything was lined up, I marked off where the 2"x4" hit the ramps and pre-drilled a few holes:
To add an easy power option, I picked up a cheapie power strip (less than $4 at Sprawl Mart) and set it in the middle of the 2"x4", and marked the outline (after taking twenty minutes to find the marker I misplaced):
Next, I took a big hoarkin' drill bit and drilled four holes near the corners of the power strip:
That's pretty much it for the "construction" phase, now we move on to the "assembly" phase. Here's were the carpet comes in - I picked up a roll of "automotive carpet" (available at Sprawl Mart, Autozone, Pep Boys, etc. - less than ten bucks). It's thin enough to be easy to cut & work with, but durable enough that it'll hold up for years. I prefer black. It's easier to pre-carpet the parts before assembly:
 Now I can screw the ramps to the 2"x4". Of course I wasn't able to find the holes I pre-drilled through the carpet, so I drilled new ones.
It's kinda nice to have handles on your pedalboard - in the past, I have just picked the most gnarly-looking heavy-duty grain bin handle at the hardware store and mounted it top and center, but I was able to find some cool-looking black handles for the sides this time. I pre-drilled some holes for them:
Next, I moved on to carpeting the plywood. Some people might tell you that this would be a good time to put down some glue or contact cement on the plywood to keep the carpet secure, but why do that when you can get a good workout by shooting several hundred staples into it?
Next I screwed the top onto the support, only breaking one drill bit in the process. After that, I used some zip ties to secure the power strip through the holes I drilled in the 2"x4" (of course, I often have to use a screwdriver, ice pick, steak knife, etc. to find the holes through the carpet):
Next, the batteries in the drill go dead. Of course, the spare batteries/charger got unplugged at some point. I stopped and made a sandwich.
After a couple hours' charging time, the handles were mounted (sorry, black handles on black carpet aren't real visible in this pic - they're more visible in the next one):
One thing I didn't count on by following my "no measuring" rule is that my plywood was just barely shorter than my carpet, so I didn't have enough carpet at the edges to fold over both ends:
But, hey, don't the Chinese use the same word for "crisis" as "opportunity"? In this case, it was an opportunity to use some carpet scraps and my hot glue gun:
That's pretty much it for assembly. Next, I took the whole thing upstairs and mocked up where I wanted my pedals to go: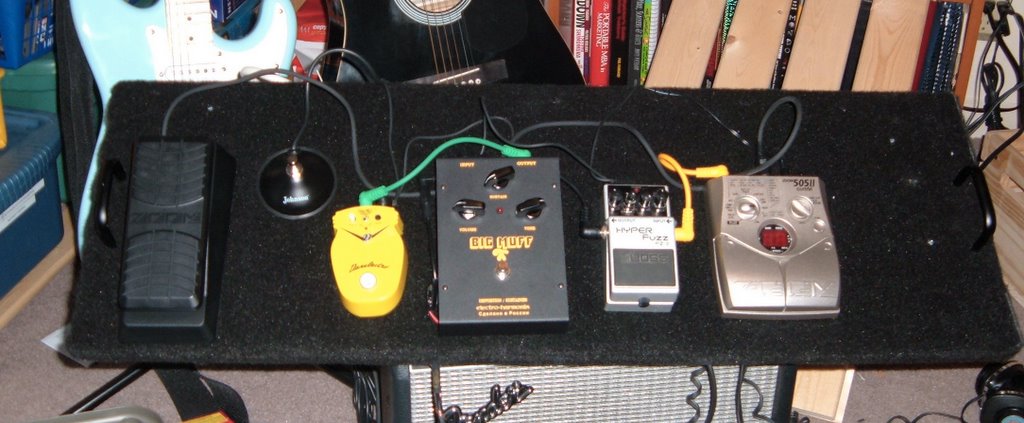 (Left-to-right is: Zoom expression pedal, clean/overdrive amp switch, Danelectro Tuna Melt tremolo, Electro Harmonix Big Muff Pi, Boss FZ-2 Hyper Fuzz, Zoom 505 II multi-effects unit).
The patch cables I used are the cheapie multi-pack available at any music store. Some people swear by cable kits that allow you make custom lengths, such as Planet Waves or George L's, but I'm not the king of Siam, so the cheap ones will do.
For a long time, there were only a few options for powering your pedalboard: 1.) Use individual 9-volt batteries for each pedal (inconvenient and expensive in the long run); 2.) Buy an expensive multi-pedal power supply; or 3.)Use a inexpensive (and potentially noisy) power supply without isolated outputs. A relatively new product is the 1Spot power supply (a similar product is available from Godlyke:
The long and short of it is that most 9-volt adapters are around 200 milliamps, and even then, most pedals only use a fraction of that (some effects, such as digital delays, are the exception). The 1Spot is 1700 milliamps max, so it can power many pedals (someone on a forum made a claim of somewhere around two dozen, although I probably wouldn't recommend that). The 1Spot uses a "daisy chain" that plugs into the adapter and has five outputs. Additional daisy chains can be connected together.
The adapters that are built into the daisy chain are the standard center-negative 2.1mm barrel connectors used by most effects manufacturers (Boss, DOD) but you can get different adapters to power other pedals (like Moogerfoogers and older MXR pedals). As a last resort, you can buy an adapter that simply has a 9-volt battery clip on the end, for really oddball pedals or ones that don't have an AC outlet at all (like my Big Muff):
After the power is sorted, velcro is added to the bottom of the pedals so they can be affixed to the board. The nice things about the automotive carpet is 1.) after a little while, the nap in the carpet "fluffs up" and obscures all the staples (although if you're really anal, you can go over the staples with a black permanent marker), and 2.) it is "fuzzy" enough to act like velcro - all you have to do put the stiff side of the velcro on the bottom of the pedals. You can staple-gun a few strips of actual velcro running the length of the board if you want it to be more secure (if you are playing gigs somewhere and have to leave your board unattended, you might want to zip-tie or even bolt your pedals down to the board). One problem with the velcro is that some pedals won't work well - for example, my Big Muff has rubber "feet" that wouldn't come off (the soft screws stripped out immediately when I tried to loosen them) and prevent any velcro on the bottom of the body from reaching the board. To solve this, I heated some wire and pushed it through the feet - this allowed me to wire a small pad of velcro directly to the feet.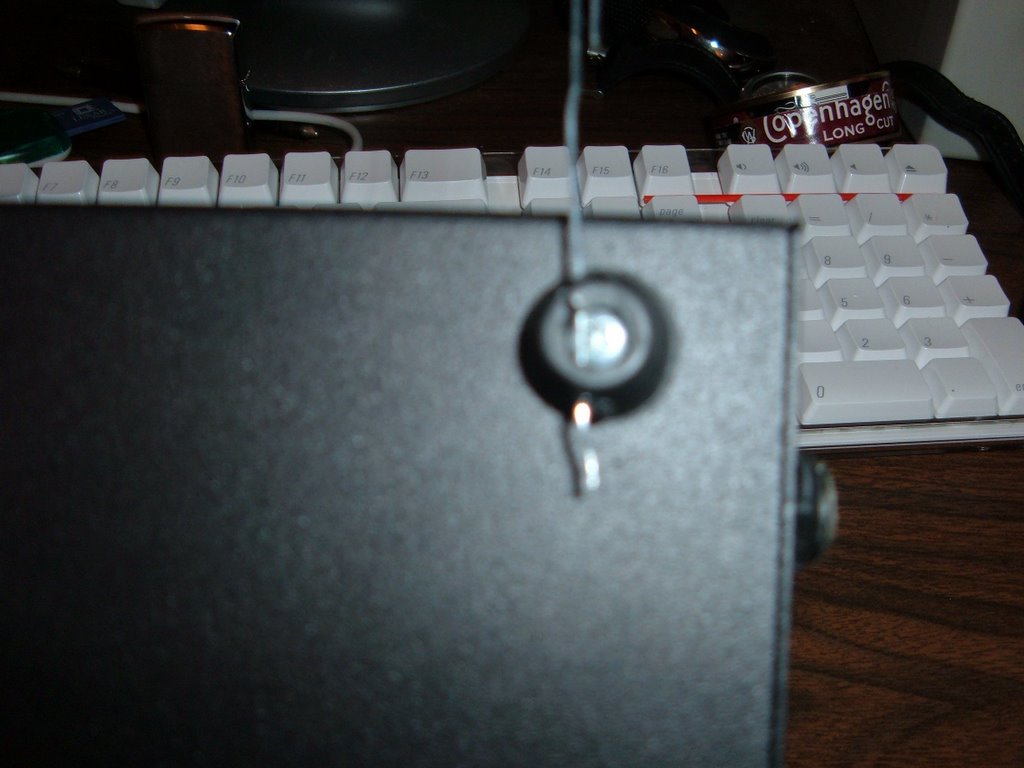
Many people drill holes & use grommets to route all their power & signal cabling on the bottom side of the board. I didn't do this because I'm a long way from having my pedalboard in any kind of permanent state (FedEx is bring me an EQ pedal as we speak). I simply took a length of velcro and made some loops to hold my cables down where I wanted them.
Everything was set up and tested out:
Works great. One thing I should mention is that this pedalboard has a pretty extreme tilt (45 degrees) - some of the commercially available ones are just a flat board, and most only have a slight rise. The reason I did this this is 1.) It's easier to build, with only one diagonal cut, 2.) I prefer it, because it forces you to poke at the pedals gently with your toes, rather than stamping straight down on it (as a big guy, I could easily destroy some of less rugged pedals on the market by accident) and 3.) when I am playing I am usually sitting down in front of my computer, and it makes the pedals easier to see. So, that's what I did with my holiday weekend. I can't imagine that anyone has read this far unless they're at least considering building one of these, so email me some pictures if you do and let me know how it turns out.


2 comments:
Rock on with your DIY self. Watch out for DIY effects and amps though. It's addictive as hell.
Funny you mention it, I was going to mod & re-case one of my pedals, but I think it's a lost cause (circuit board is damaged). And I hear the Pignose G40V is a great amp, I would just need to add a 45K resistor & a 25K potentiometer to dial in the sound...
Post a Comment